Additive angles are more than just another geometry concept; they’re a powerful way to help students connect measurement, reasoning, and problem-solving. In this post, we’ll explore how to teach additive angles effectively, with hands-on strategies and ready-to-use classroom resources for practice.
What Are Additive Angles?
Additive angles are angles that share a common vertex and a common side but do not overlap.
When two or more angles fit together to form a larger angle, their measures add up to equal the total angle.
In other words:
Whole angle = Part 1 + Part 2 (or more parts)
For example, if one part measures 40° and another part measures 50°, the total angle is 90°.
Students can also use this concept in reverse, subtracting a known part from the total to find a missing angle.
Why Teaching Additive Angles Matters
Teaching additive angles helps students strengthen their spatial reasoning and logical thinking.
It encourages them to look beyond memorization and truly understand how geometric parts relate to a whole.
When students master additive angles, they can:
- Recognize angle relationships in shapes and real-life contexts.
- Solve multi-step geometry problems with confidence.
- Build a strong foundation for future geometry topics like polygons, triangles, and transformations.
How to Teach Additive Angles: Step-by-Step
1. Begin with Concrete Models
Start with something students can see and touch.
Use paper folds, hinged arms, or manipulatives to show how two smaller angles fit together to make one larger angle.
Ask guiding questions like:
- “What happens when I move this arm?”
- “How does the total angle change?”
This physical exploration helps students visualize additive reasoning before moving into equations.
2. Move to Visual Diagrams
Once students understand the concept physically, move to drawn models.
Sketch angles on the board and label the known and unknown parts.
Then, model how to set up an equation.
Example:
If ∠ABC = 120° and ∠ABD = 70°, then
120° = 70° + X
Students can use subtraction to find the missing part:
X = 120° – 70° = 50°
Encourage them to label diagrams carefully and double-check their reasoning.
3. Gradually Increase the Challenge
Scaffold problems from simple to complex.
- Begin with two-part angles.
- Move to multiple angles on a straight line (sum of 180°).
- Introduce angles around a point (sum of 360°).
Encourage students to use color-coding or arrows to show which angles they are adding or subtracting.
As they gain confidence, mix in real-world contexts like clock hands, triangles, or design patterns to make practice meaningful.
Common Misconceptions and Fixes
- “All angles that touch must add up to 180°.”
→ Clarify that only angles on a straight line do. Use visuals to compare. - “The largest angle must have the biggest number.”
→ Emphasize that measurement depends on rotation, not line length. - “I can’t add angles that look different.”
→ Show how angles can still share a vertex and form a whole, even when they face different directions.
Addressing misconceptions through visuals and discussions ensures lasting understanding.
Ready-To-Use Resources for Practice
Once students have the basics, they need structured practice to reinforce their skills.
This is where differentiated worksheets can make all the difference.
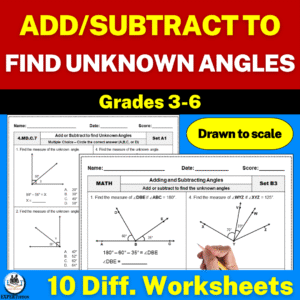
The Additive Angles Worksheets: Finding Unknown/Missing Angles set is designed for guided and independent practice:
- Set A (Multiple Choice): Great for warm-ups or quick checks.
- Set B (Open-Ended): Encourages deeper reasoning and written explanations.
- Angles are drawn to scale, so students can measure with a protractor to verify their answers.
- Includes answer keys and data trackers to make grading and progress monitoring simple.
Teachers can use them for morning work, homework, assessments, or review—perfect for reinforcing understanding across skill levels.
-
 $ 3.75
Assessment and Differentiation Tips
- Use exit tickets: Ask students to find one missing angle and explain their process.
- Provide visual scaffolds for students who need more support.
- Challenge advanced students with multi-angle puzzles or real-world design problems.
- Track student growth over time using simple data trackers to inform instruction.
Connecting to the Real World
Help students see that additive angles are everywhere.
In clock faces, road intersections, architecture, and even artwork.
Ask them to identify where they see angle combinations in their surroundings and explain how they could find the missing measure.
This makes geometry tangible and relevant.
Final Thoughts
Teaching additive angles is all about helping students see how parts come together to form a whole—visually, numerically, and conceptually.
By modeling, discussing, and giving students plenty of practice opportunities, you’ll build a solid foundation for geometry success.
If you’re looking for ready-to-use resources, the Additive Angles Worksheets offer everything you need—multiple formats, visual accuracy, answer keys, and tracking tools—to make teaching and assessing smooth and effective.
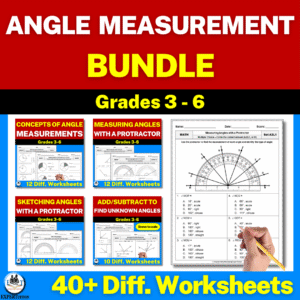
SAVE WITH THE BUNDLE (20% OFF)
-
Product on saleOriginal price was: $ 15.75.$ 12.60Current price is: $ 12.60.